✨ Getting started with Lazy
Downloading & set-up
We’re so excited to introduce you to Lazy! We’ve built Lazy to seamlessly integrate into your workflows, allowing you to access Lazy from your Mac and iOS devices and from the web.
Upon installing the Mac app, you’ll be guided to enable the permissions for Lazy. If you need any help enabling the permissions for Lazy on your Mac, you can read more about them, here: .
An introduction to Lazy
The following will be a guide on how to acquaint yourself with the Lazy interface, and some of the key steps for using Lazy. If you’d prefer to see a video walkthrough, you can find that here.
📸 Making your first capture
Capturing highlights
A central tenet of Lazy is enabling you to capture at the speed of thought from anywhere.
Let’s give that a try, now.
First let’s open up an article (or perhaps this blog post), select some text on the page and then click Lazy’s capture command, ⌘+L.
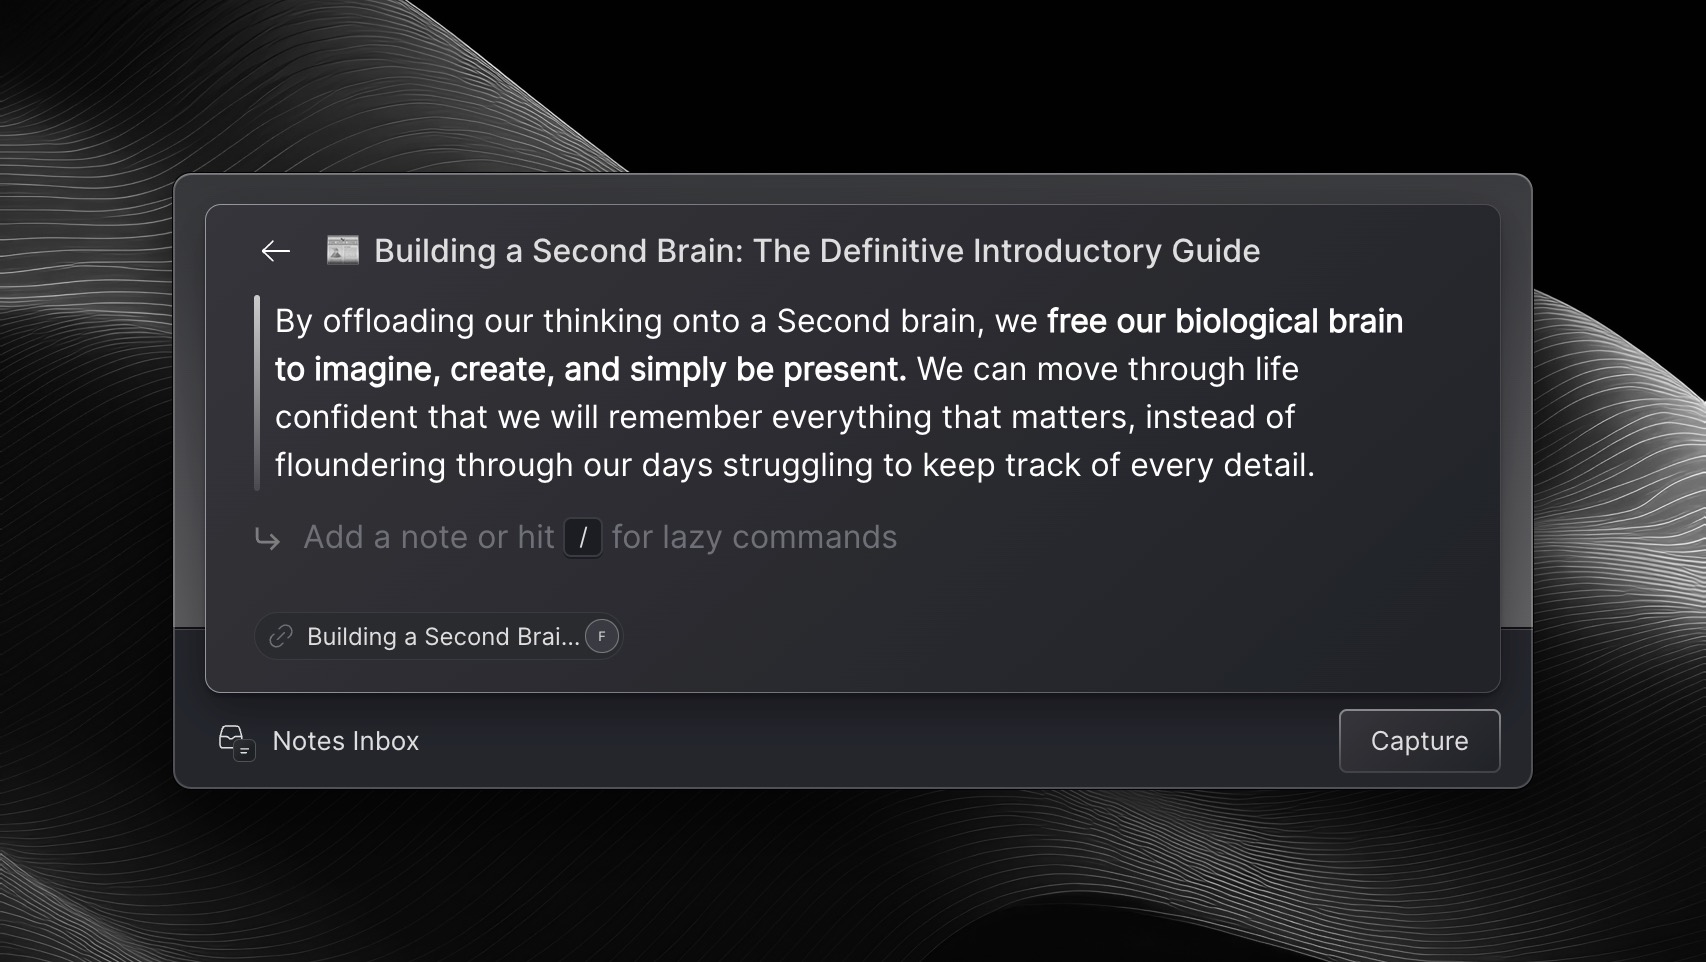
Lazy has already automatically captured the following:
The text you highlighted on the article
The Context of the article you were on. Namely the Source and Author of the article you captured.
When capturing with Lazy, we give you the flexibility and control to choose what information you want to capture at any given time.
If you were to capture now, Lazy would retain the text you’d highlighted, in addition to the context of where you captured the highlight from.
However, using Lazy’s / Commands and Lazy AI, you can continue to enrich your notes even further.
/ Commands
Now we can try the / commands.
Inside of the Lazy capture tool, type a / and you’ll see a drop-down of different commands you can perform inside of the Lazy capture tool. Here you can access many of the most important features for interacting with and formatting your notes.
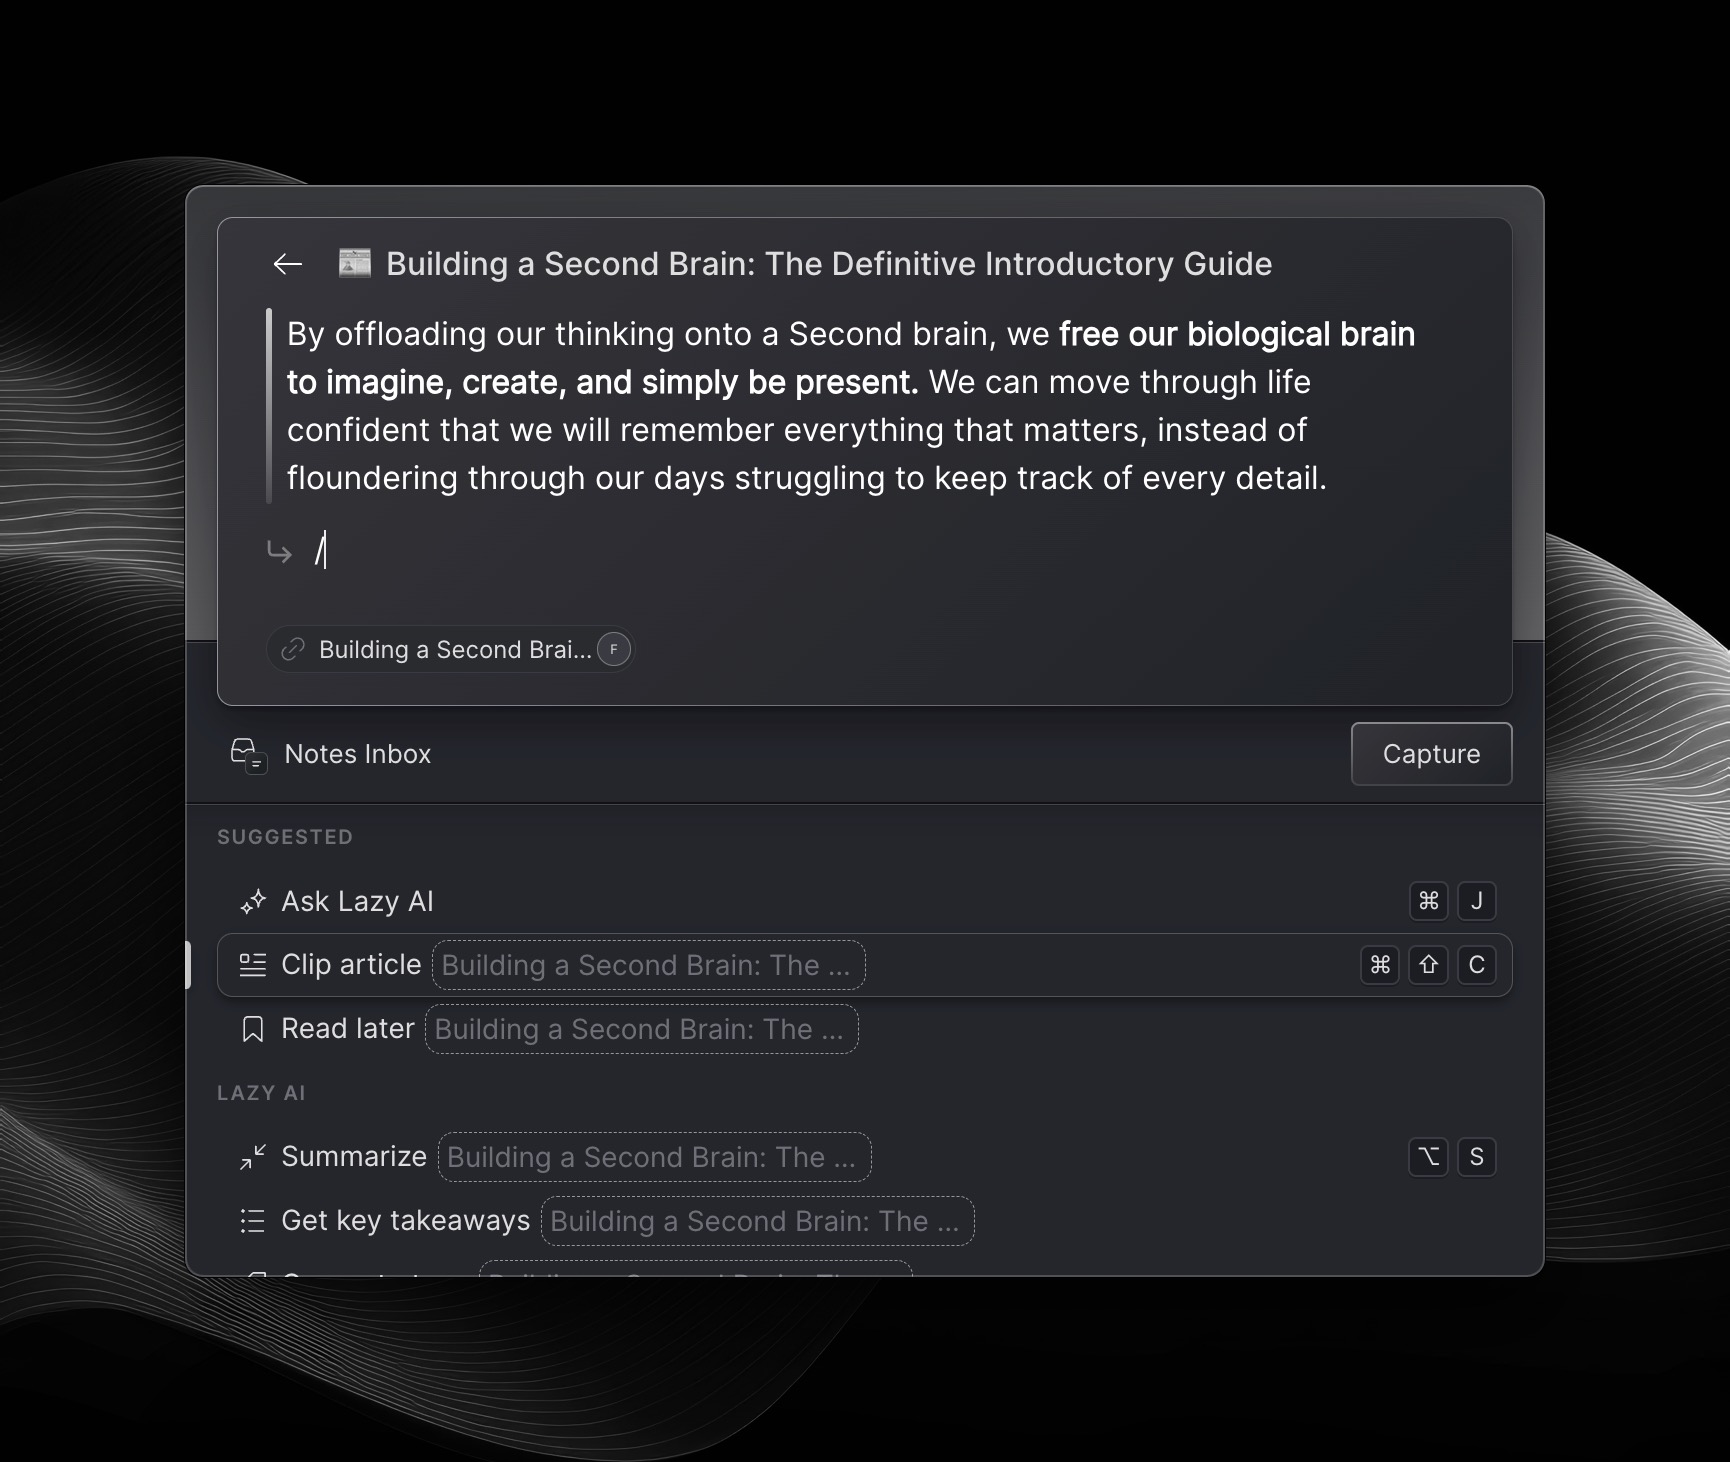
Clip content
There’s a number of different commands for you to explore, but the most important right now, is the /clip command.
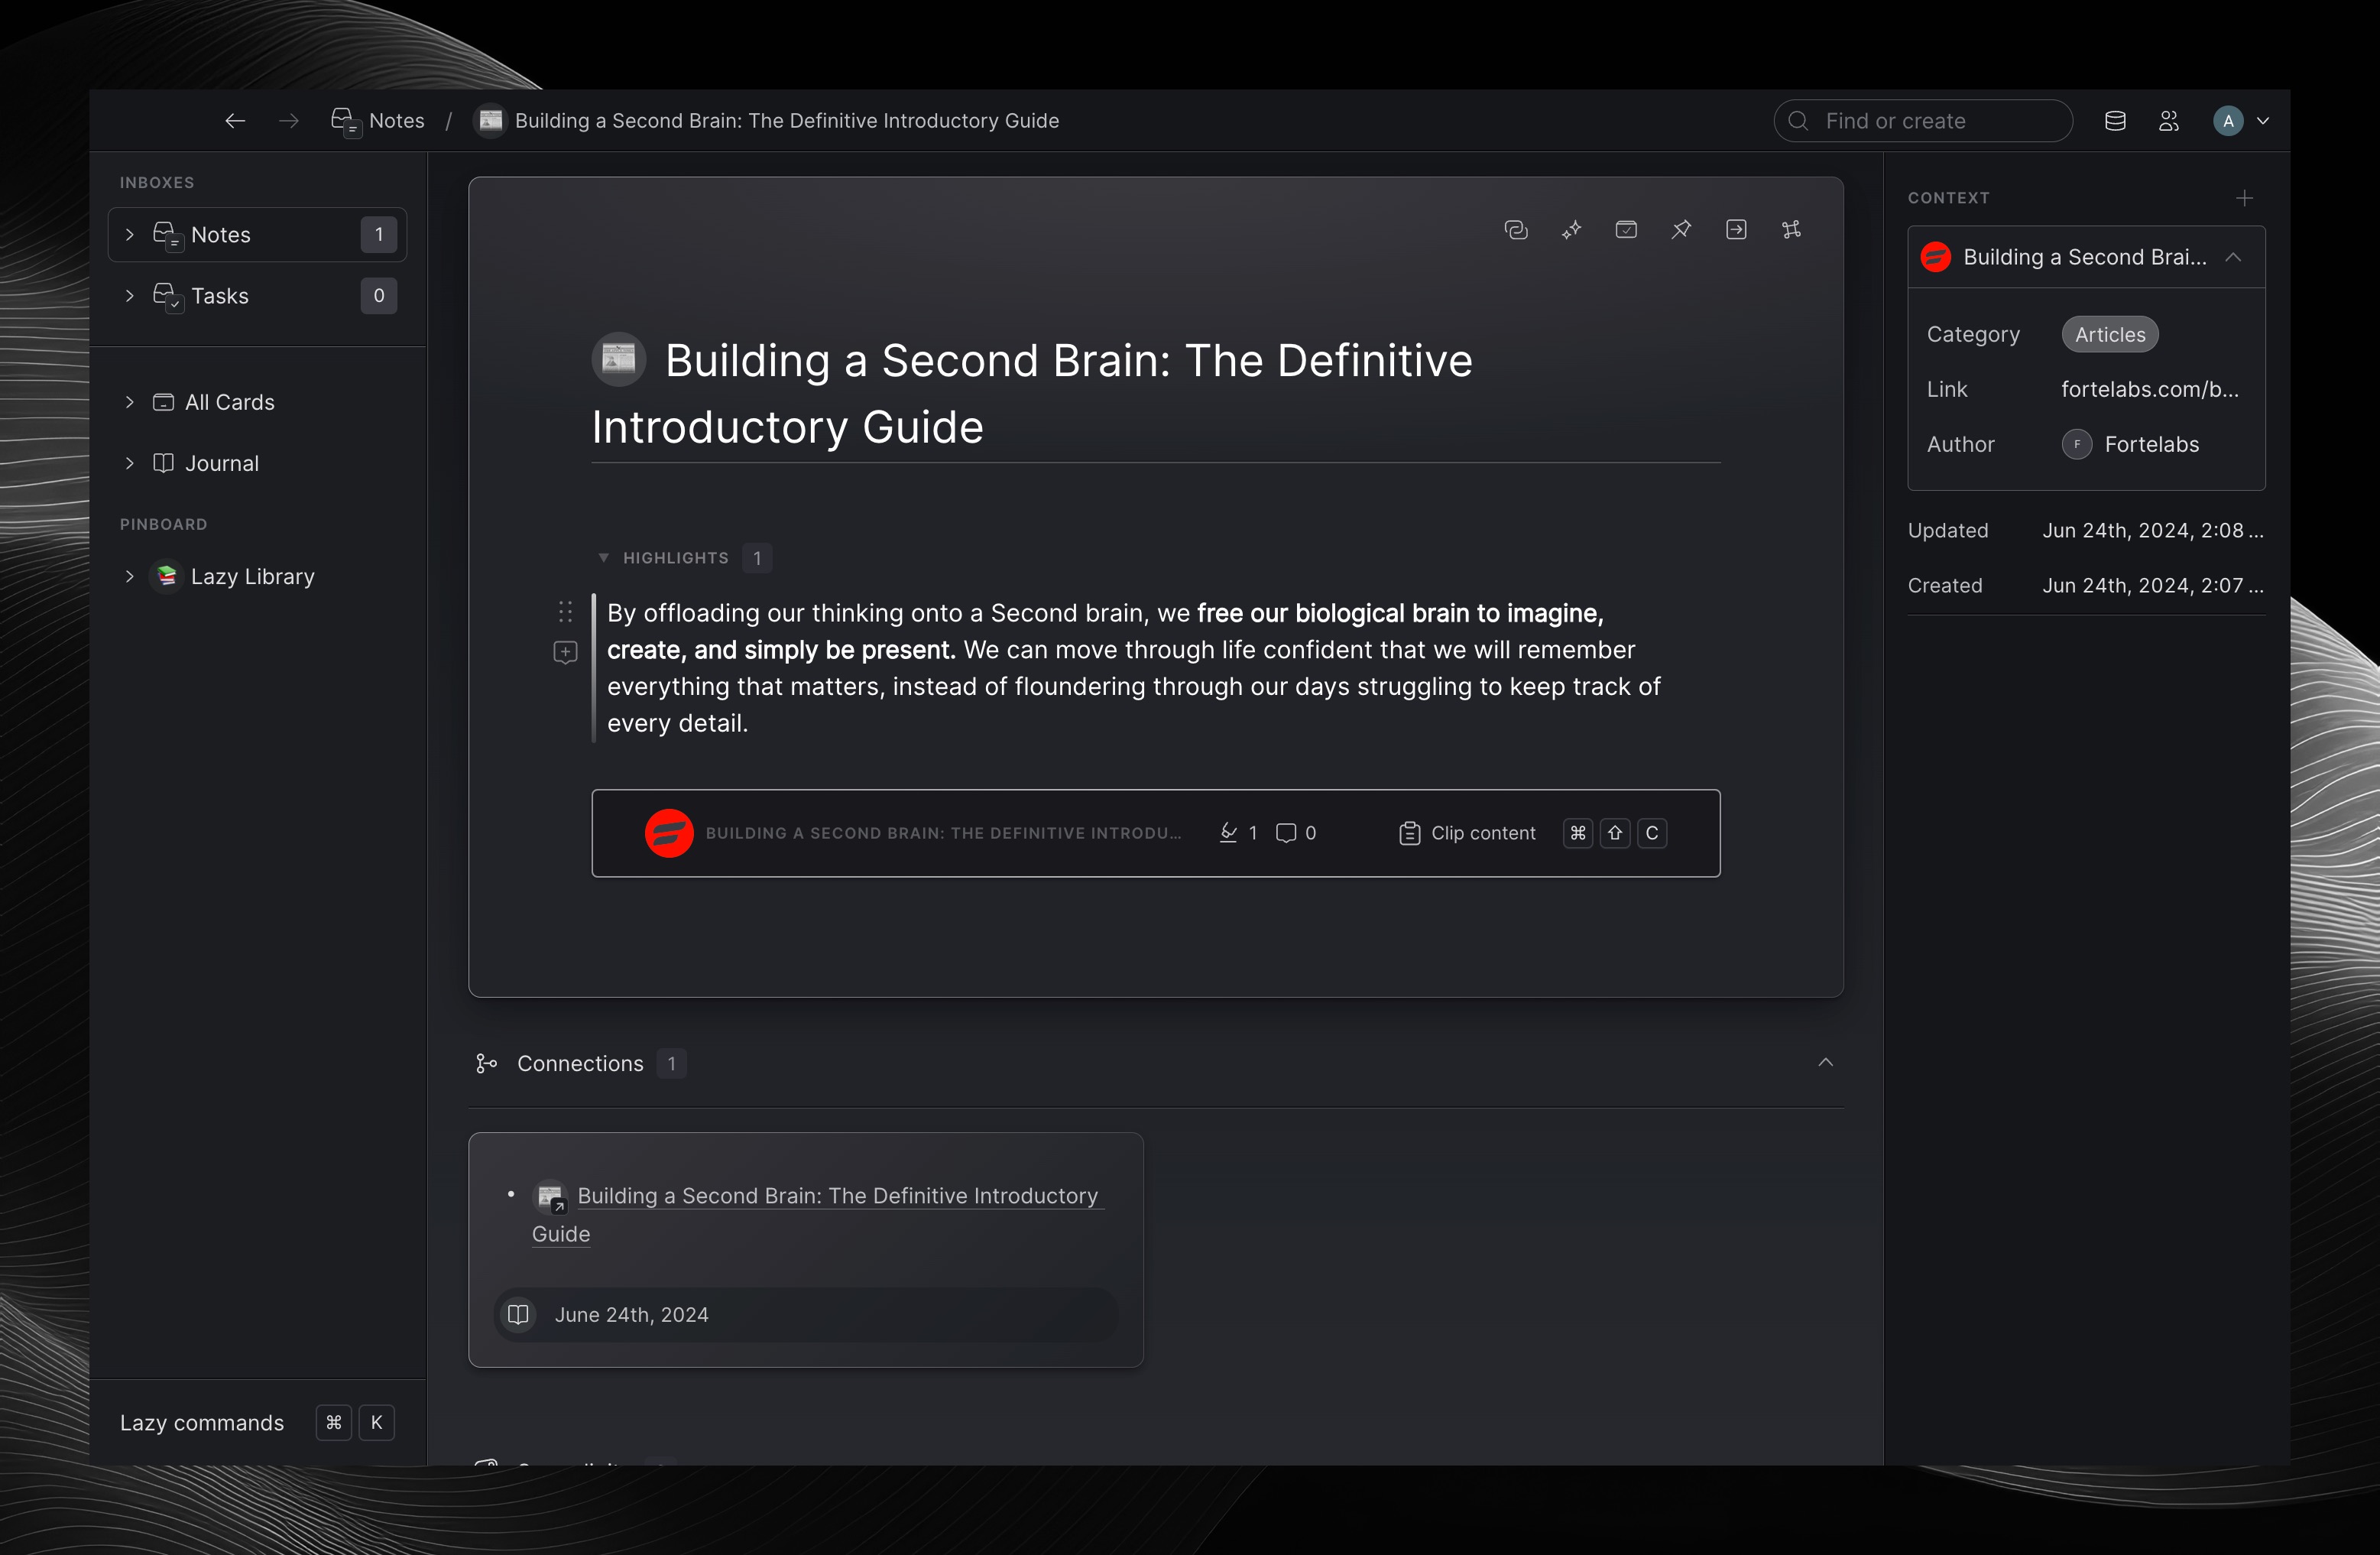
Clipping an article enables you to capture the entirety of the article from the web and formats it nicely in to your note in Lazy. This will preserve all of the text, formatting and images from the article into a beautifully crafted note in Lazy.
After doing /clip, you’ll see a preview of the entire article shown inside of the Lazy capture window. This confirms the article has been successfully clipped.
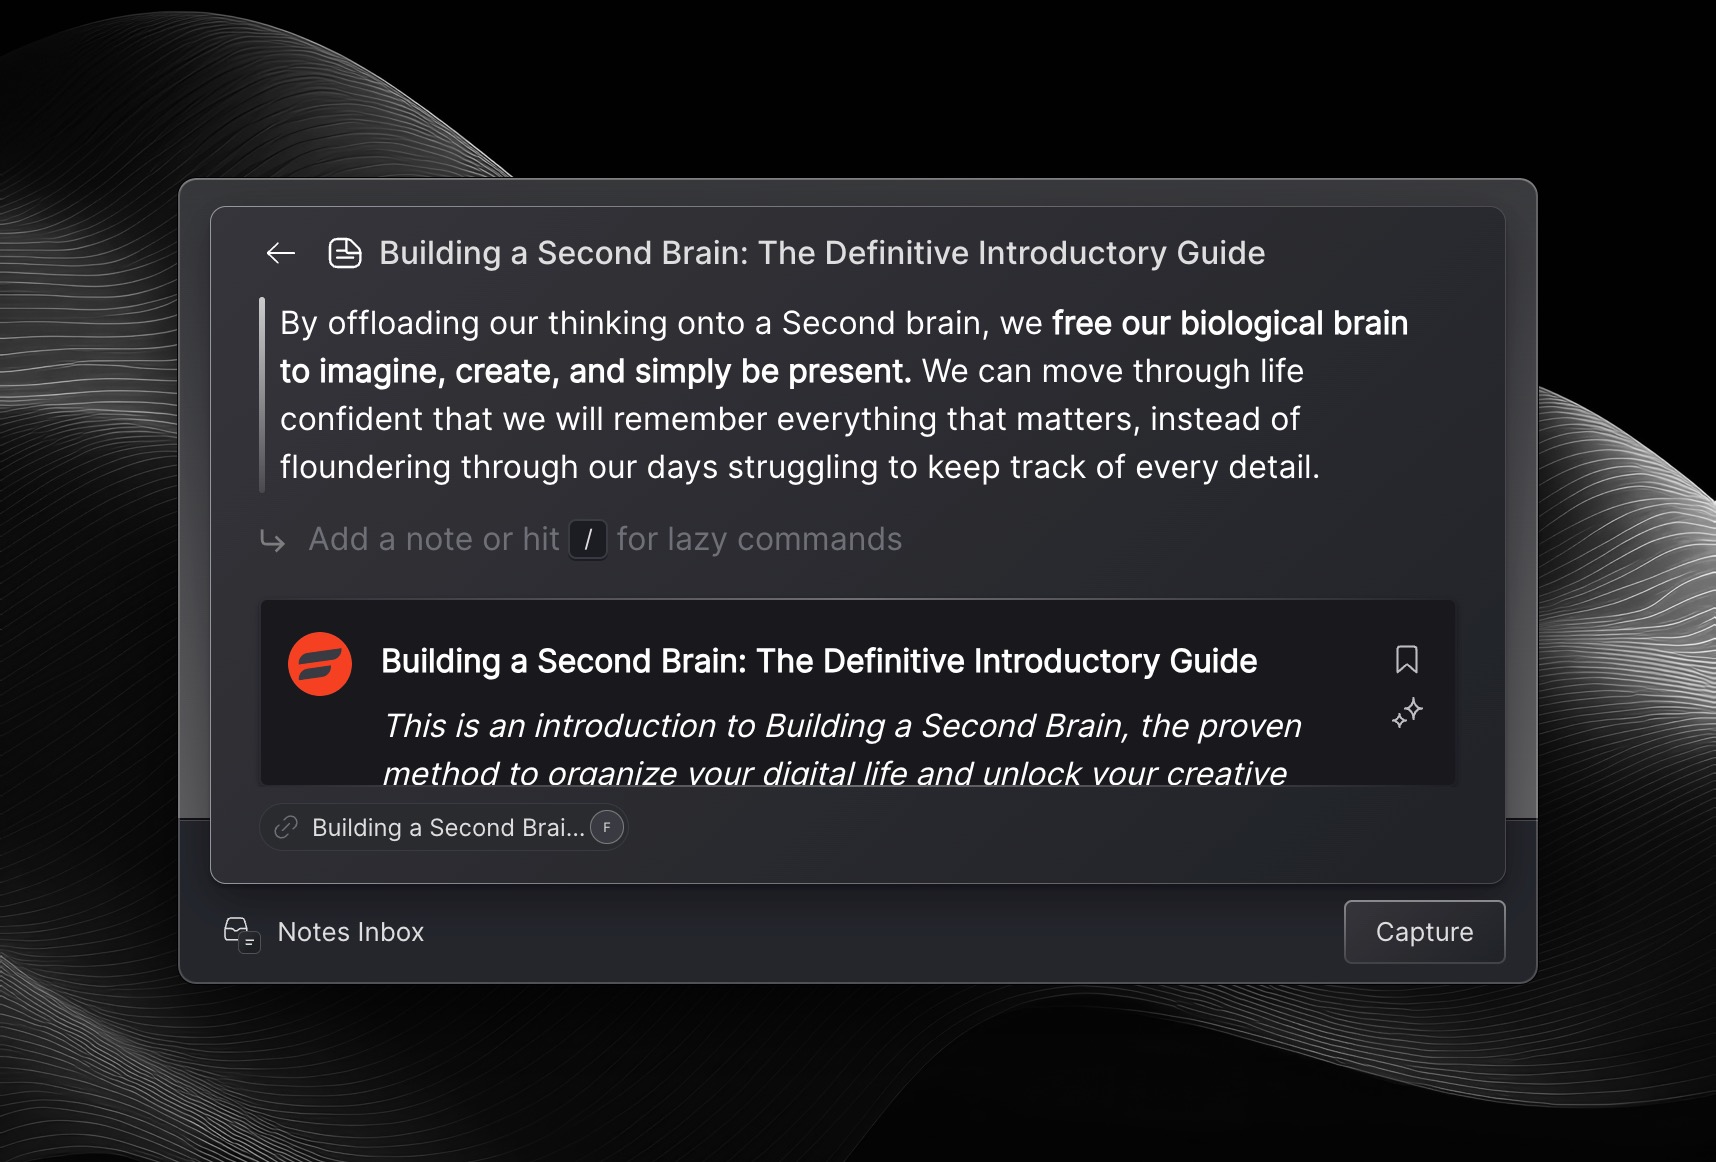
If you were to now capture your note, your note will contain both the highlight you made on the article, as well as a Clip of the entirety of it’s contents including text, formatting and images.

All highlights you do using the capture tool on the same article will also be highlighted inside of the Clip.
Using AI while capturing
While we’re here, we can also experiment with the AI features.
If you click / again, you’ll see a number of AI commands:
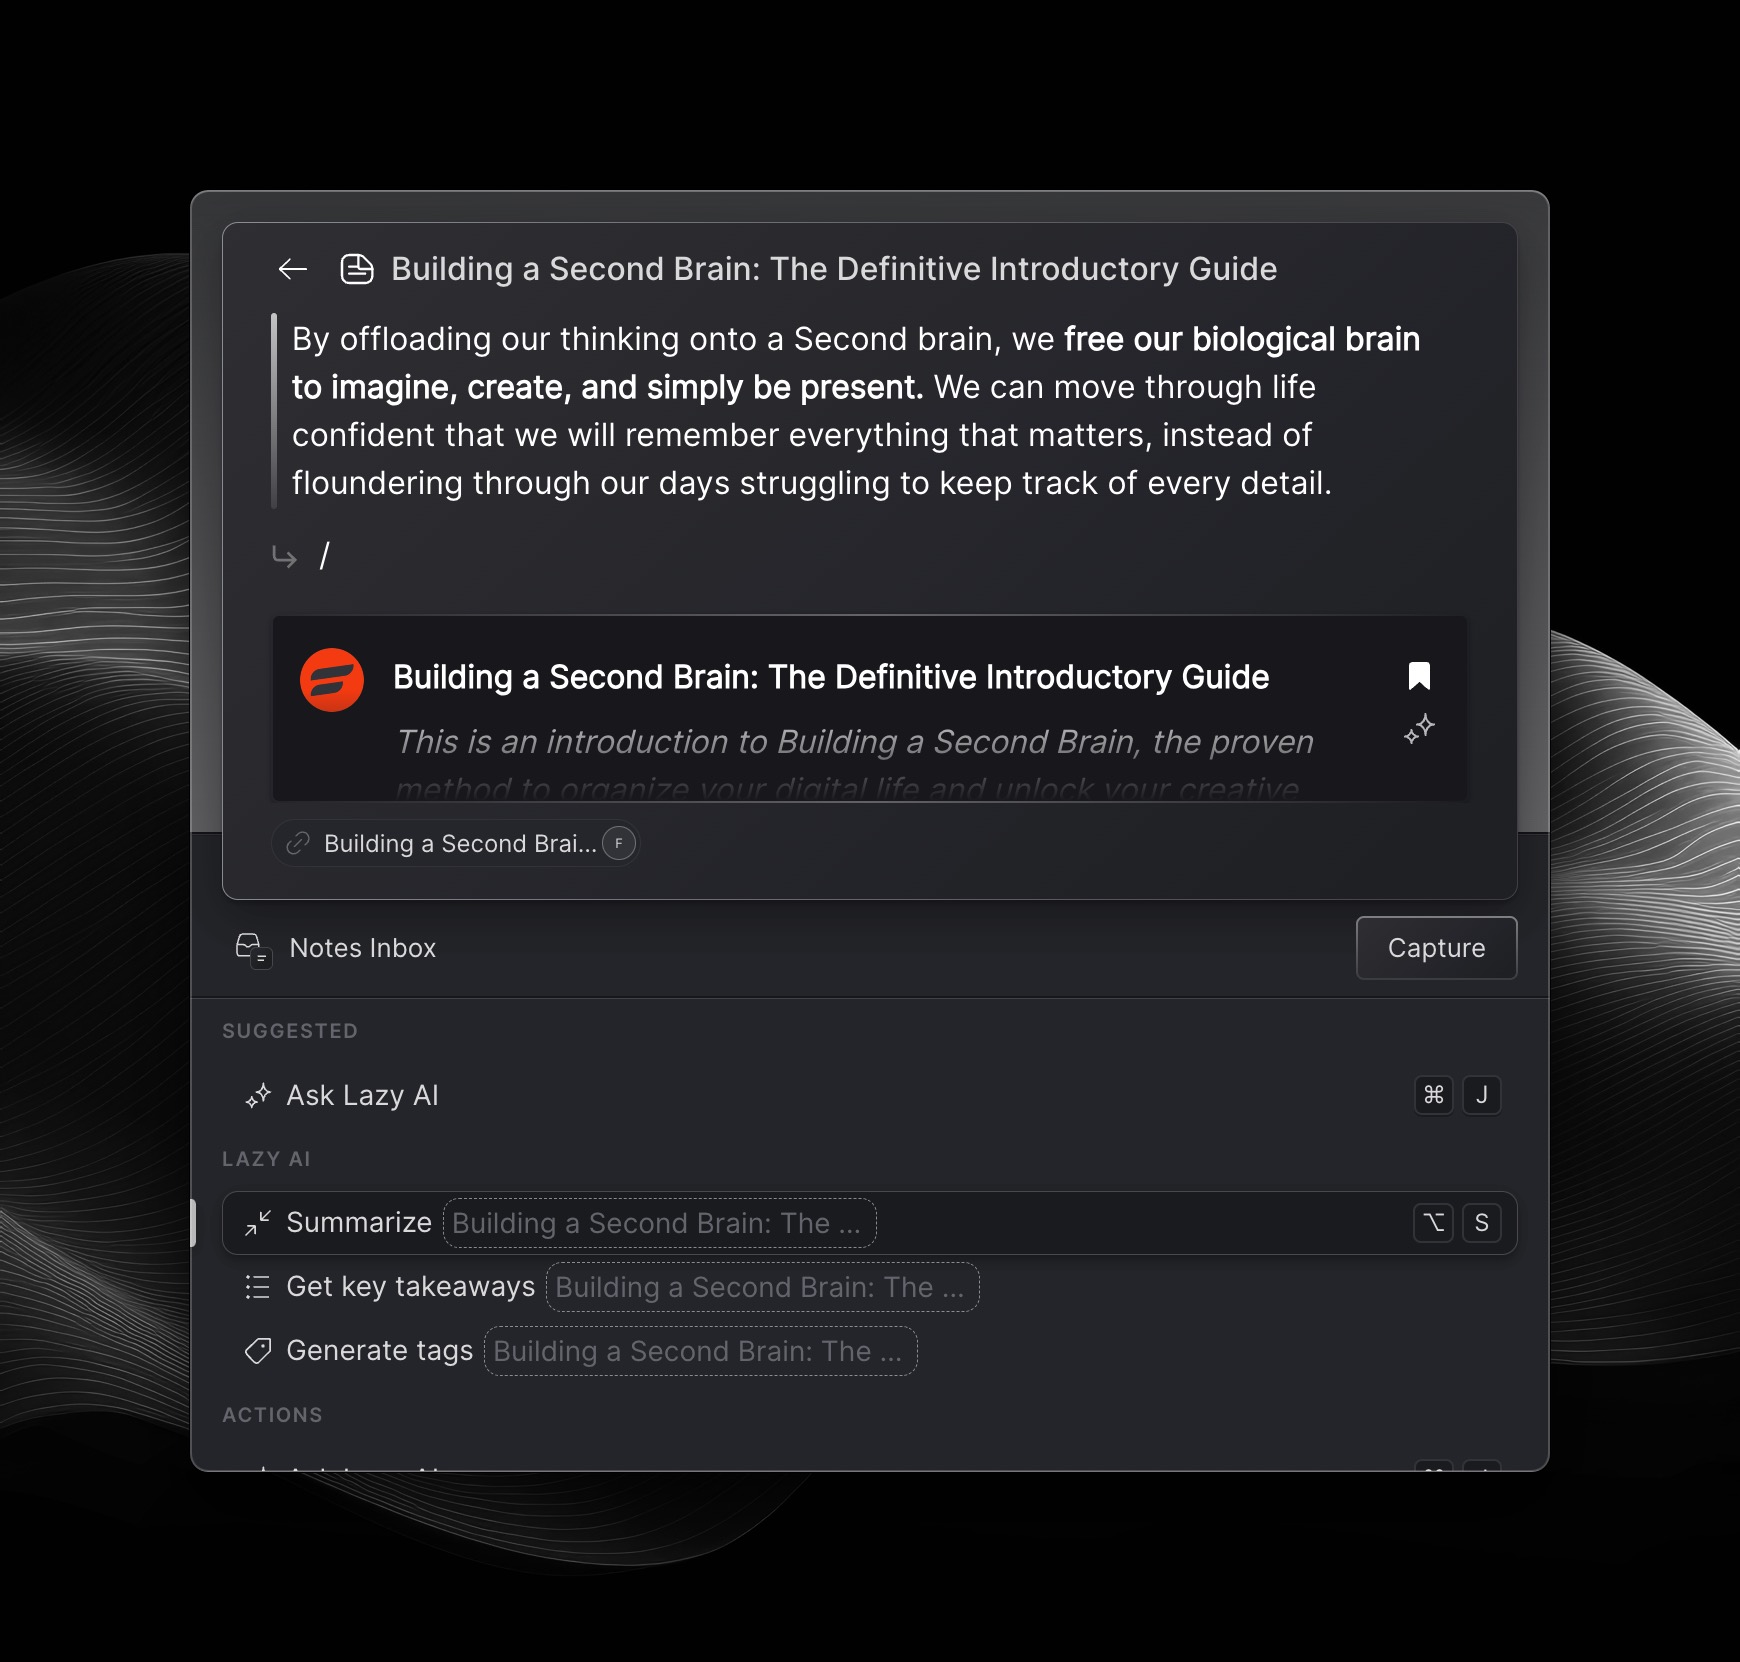
Ask Lazy AI - will open Lazy’s AI menu (⌘+J) for you to customize prompts and what context to use Lazy AI on top of.
Summarize, Get key takeaways, Generate tags - are built-in prompts, which will immediately prompt Lazy AI about the ‘Source Content'. This will mean that Lazy AI will be prompted to look at the entire content of something you’re capturing Lazy on top of, whether that be the entirety of a tweet, article, PDF, email or something else.
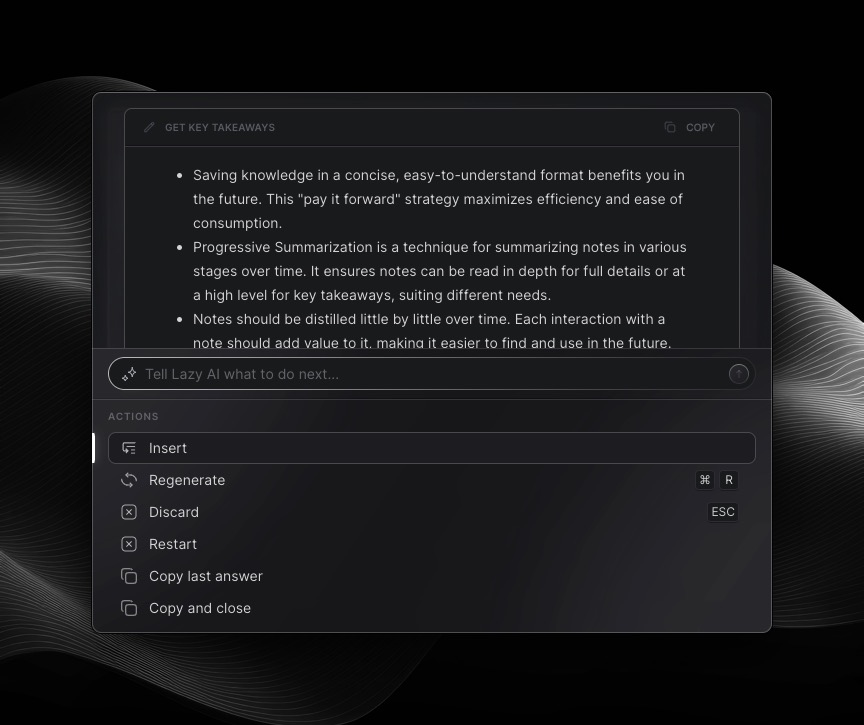
After getting a response from Lazy AI, you can then choose one of the following options:
Insert - To add the AI response to your note
Regenerate - To re-prompt the AI with the same prompt
Discard - To close the Lazy AI menu, and to return to your note
Restart - This allows you to start a new thread with the AI and choose a different prompt
Copy last answer - To copy the last response to your clipboard
Copy and close - Will copy the last response from the AI and close your AI menu
Capturing Tasks with Lazy
Capturing tasks is as easy as it is to capture notes with Lazy. Simply click ⌘+L to capture content and then click ⌥+⏎ in order to capture something as a Task.
When capturing tasks you may wish to update the title of it too, so that you know exactly what you need to get done, when you come to tick off your tasks in your Tasks Inbox.